Digital Painting for Beginners: Your First Easy Session

A blank canvas can feel like a big commitment, but your first digital painting can be small and imperfect. You don’t need dozens of brushes or a new device to begin. Pick one subject, use a few familiar tools, and aim to finish a simple version. We’ll walk you through a first session that leaves room to experiment without turning every stroke into a major decision.
Pick one small thing to paint
A mug, a leaf, or a landscape made of a sky and two hills gives you clear shapes to work with. Choose one subject rather than a detailed scene. If you paint a mug, for example, you can focus on its body, handle, and shadow without also figuring out a tabletop full of objects.
Set a modest finish line: sketch the main shape, add broad color, and include one or two details. A highlight on the mug or a vein on the leaf is enough. Your first painting is practice, not a portfolio piece. Finishing it will teach you more about your workflow than spending the whole session perfecting one edge.
Keep your tools simple
You need a drawing app, a device that runs it, and an input method you can use comfortably. That might be a computer and mouse, a touchscreen and finger, or a tablet and stylus. Start with what you already own before deciding whether extra equipment would help you practice regularly.
In your app, find a pencil-like brush for sketching, one opaque brush for filling broad areas, and an eraser. Limiting your choices keeps you painting instead of comparing presets. Before you touch your main sketch, make a few test strokes. Change the brush size, try lighter and heavier marks if your input allows them, and see what a lower opacity does. You can then return to settings that feel predictable.
| Tool or choice | Start with | Why it helps |
|---|---|---|
| Canvas | A modest canvas size | Keeps the project manageable |
| Brushes | A sketch brush and an opaque paint brush | Cuts down on preset browsing |
| Colors | Three to five colors | Makes color choices less overwhelming |
| Layers | Sketch, color, and optional details | Gives you room to revise |
If you want help learning an app’s controls, the Krita Documentation and GIMP Documentation offer tool-specific instructions. You only need to look up the controls you’ll use today.
Use layers without making them complicated
Think of layers as separate, movable parts of your painting. Put your sketch on one layer and your broad colors on another. Add a details layer only if you want to try highlights or small marks without changing the color underneath. That is plenty of structure for a first project.
For example, if your painted leaf looks too dark, changing its color layer can leave your sketch untouched. You can also hide the sketch briefly to see whether the painted shape reads clearly on its own. Name layers when names help you find something; “Sketch” and “Color” are useful, while a complicated naming system can wait.
Follow a confidence-building workflow
1. Choose your subject
Place the real object or a reference where you can see it, or decide on a simple imagined scene. Ask yourself: can you describe its largest shape in a sentence? “A rounded mug with a curved handle” is a good starting point.
2. Sketch the largest shapes
Draw lightly and leave out tiny features. For a mug, begin with the body and handle; for a landscape, begin with the horizon and the largest hill. Pause and ask: is the subject recognizable? If not, adjust the big shapes before adding more lines.
3. Block in flat colors
Use your opaque brush to fill the main areas. Choose a small palette rather than searching for the perfect shade. At this stage, ask whether the main colors are in place—not whether every edge is tidy. Broad color makes it easier to see what the painting actually needs.
4. Add a little light or shadow
Choose one side for the light and add a single darker area or a small highlight. You don’t have to model every surface. Ask whether one adjustment makes the form clearer. If it doesn’t, undo the stroke and try a simpler mark.
5. Stop and review
Zoom out or step back. Can you identify the subject at a glance? Is there one change that would make it clearer? Make that change, then call the painting finished for today. Undoing and retrying strokes is normal; endlessly correcting them can keep you from completing the small project you set out to make.
Make the next session easier
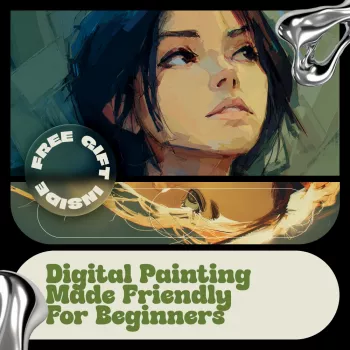
If you’d like a guided starting point, our Digital Painting Made Friendly for Beginners guide brings together beginner tips on tools, brushes, layers, and a manageable workflow. You can use it alongside the app and device you have now.
Some creative projects also grow into business goals. If that describes your next step, our From Dream to Done business goal-setting checklist is a separate planning option. For today’s painting, though, your goal can stay simple: save one finished practice piece and decide what you’d like to try next.
FAQ
Do beginners need a drawing tablet to start digital painting?
No. Start with a device and input method you already have; you can consider a drawing tablet later if you decide to draw regularly.
How many brushes should a beginner use?
Two basic brushes are enough for a first project: one for sketching and one opaque brush for painting broad areas.
What should a beginner paint first?
Choose a small subject with clear shapes, such as a mug or leaf, and aim to complete a simple version.














Leave a comment